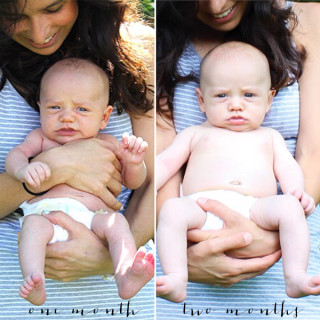
A couple of posts ago, I wrote about our visit to Jacksonville to meet our brand-new little niece, Emma – but I didn’t mention how big of a role this brand-new little craft played in that trip.

Let me paint the picture: DCA airport. Zillions of people. Five spools of yarn, four cardboard letters, one roll of masking tape, and a glue gun with no outlet in sight. And me, sitting in the middle of the terminal, tangled up in all of it. I have no shame.

Let’s just say I underestimated how long these cute little letters would take me. I started on Tuesday, thinking that by the time we leave DC Friday night, I will have had time to wrap our entire apartment in yarn if I really wanted to. (I didn’t really want to, but that sort of kind of happened anyways. Matt just lovessss when I do crafts!)
Thank goodness I was allowed to take up the entire kitchen table at Amy and Brian’s once we landed and was able to enlist another adorable neice, Miss. Abigail Milkes as my craft assistant. She made sure every inch of the letters were covered and helped me match the yarn and the fabric flowers together. I couldn’t have done it without her!

Now don’t get me wrong: this is not the hardest project in the world. Once you get the hang of it and the way of the yarn/direction to wrap, it is pretty easy and takes no time at all. So much so that you should totally do it. Right now. I would lend you some yarn but unfortunately I can only untangle about a foot and a half at the moment. The rest is wrapped around our apartment, remember?
I would recommend a bit of practice or just a general gameplan before you begin wrapping, though. (I somehow always forget the “gameplan” part. Hence why it looks like the aftermath of a preschool art class in our living room every time I get crafty. Or why I was seriously considering asking the stewardess if I could use a glue gun in-flight.) Figure out what direction to start and/or what sections you should wrap/cover beforehand as some spots (like the bottoms of the letters, or curvy angles). If this doesn’t make sense now, come back and read this after you’ve attempted your first letter. Well, only if that first letter isn’t an “I” or an “S.” In those cases, STOP WHINING!

Since I wanted to jazz up my letters a bit for little Miss. Emma, I added fabric flowers that I had made a few months ago. They actually were my first post-wedding craft, so I got a little bit too excited about them and made approx. 247 of them. Just kidding. But seriously. I found the amazing video (so helpful!) tutorial here.
Even though these letters were for Emma’s nursery, I wanted to pick colors that would go along with Stephen and Kim’s amazing décor and ones that could also grow with Emma – you know, through preschool to high school to who knows – her college dorm at St. Bonaventure?! :)

After we left, Kim texted me a picture of the letters up in Emma’s room. I am so thrilled that they loved them, and hope they always serve as a reminder of how much we love them & Emma!

Ingredients:
- Cardboard letters (I bought mine at Paper Source, but I know they sell them at Hobby Lobby)
- Yarn of your choice
- Glue gun
Directions:
1) After you practice/map our the direction of your yarn and your game plan for covering up those hard-to-cover spots*, place a small dab of hot glue on your desired starting place and-you guessed it- begin to wrap! If you need to start a new piece of yarn, just hot glue it down where your last piece ended and wrap around the end at least once to conceal.
2) Be sure to start/end your yarn on the back side of the letter, as you want the front to look as pretty as possible!
3) Once you are complete, embellish with flowers, buttons, etc. – or just keep them plain, as they are simply perfect as-is.
*For hard-to-cover spots, like the bottom of letters and/or flat edge, (like the top of the “m”): cut little pieces of yarn and glue down separately. Then conceal any edges/frays by wrapping yarn over.

Now that I am a yarn-wrapping freak, I am happy to make these for all of my other nieces and nephews, friends, coworkers, etc – as long as their first name is four letters or under.
AGAIN, just kidding. But seriously.
this has been on my to-do list for a long time–yours look really cute!
Thanks so much! I love your blog – a few friends of mine live in Austin and travelling there is very high on my “to-do” list!
These letters are awesome!
I am planning on wrapping just the initials of my neice… then when she eventually get’s married… I can do a new one for her new last name!
That is a great idea! They really are the perfect gift for any occasion.
I am planning on making these to use for a photography session with my newborn niece! About how much yarn covers one letter?
Hi Emily! WHat a great idea to use them in a newborn photo shoot! I am not sure exactly how much yarn I used on each, but I used three 3.5-ounce balls of yarn and one eight-ounce and still have plenty leftover for future yarn-wrapping projects. :)
How gorgeous! I have these letters in my son’s room but they’re only painted. Once I am sick of them I will do this to them for sure. It’s far nicer and warmer and natural looking than primary colour paints! I only wish I’d done it for when he was a newborn too. Nevermind, there will be more to come.
I’m sure they look great painted!! I love these letters even in their plain state of cardboard. You could also try covering them in fabric or even printed paper…depending on how many children you plan on having. :) Thanks for visiting my blog!
I love these letters. Where did you find them?
Thanks Julia! I bought the cardboard letters at The Paper Source, but I know they also sell them at Hobby Lobby. I saw the idea online a long time ago, and decided to try it myself but put a little spin by adding the fabric flowers. I highly recommend making them! :)
Thank you for an awesome idea! Starting making some for my daughter’s nursery…all 7 letters for Liliana! Whew!
Started my dsughter’s name, Liliana. Looks cute but 7 letters is… whew! Thanks for the great idea!
Thanks so much, I’m glad you are making them! Liliana – what a gorgeous name. And although seven letters may seem like a lot, I promise you will be so happy with them once you are done!
These are ADORABLE!! I have wood letters that are painted white. Do you think they would work for this project? Or do you think they would be too slippery for the yarn? I just love your idea! My daughter is 9 and this would be a great way to freshen up her name on her wall!
Hi Lee – thanks so much for your comment! I think the white letters would work perfectly fine. If the yarn starts to slip, just pin it down with a bit of hot glue. I had to do this a few times with these letters, especially when trying to wrap weird angles! Just make sure you use the glue on the backside/side you don’t want to show. I tend to get a bit messy with glue guns. :) Haha let me know how yours turn out!
I am going to attempt this project in the next few days, thanks to seeing the link to this on Pinterest! Can you explain a little more detail how you do the ends of letters (bottom of the ‘m’, tail of the ‘a’)? Yours look very neatly done!
Hi Robyn! I hope I am not too late in replying. For the bottoms of the letters, I actually cut yarn into little pieces (probably about two-three inches) and “wrapped” the bottoms by putting hot glue down and then laying the pieces of yarn in a row. I then covered the loose ends when I wrapped the sides of the letter. And wah-lah! It looks like you wrapped the bottoms. Let me know if that helps! I have plenty of pictures of the process, so I’d be happy to send those as well. Thanks for visiting my blog, so happy you found it through Pinterest! :)
I have a daughter named Emma and getting her name above her crib has been on my to-do list for a while now. I’ve seen many ideas, but absolutely love this! Would you mind to share where you started on each letter??
Hi Sarah! Congratulations on your little Emma. :) Since I did these letters way back in January and gave them away to my niece, I am having a bit of a memory block on where I started each letter! I believe with the “e” I began wrapping in the inside left corner, as I thought it would be easiest to start there and then wrap all the way around, in the same way/direction you would write a lowercase “e.” For the two m’s, I wrapped the square bottoms and top first (by cutting smaller pieces and gluing them down in a row side-by-side, to make it look like they were wrapped). Then I wrapped the two humps (if you will haha) as they were the most difficult to cover neatly. Once I figured out how to cover that surface area (I alternated wrapping one way, under one hump and then the other way – this is best shown in the yellow “m”) then I started on the three legs. For the “a” I did the same thing with the square top/bottoms and then started wrapping at the top curve, continuing down and then doing the circle and rest of the curve. Once you reach a point where you can’t wrap continuously, just hot glue the yarn down to the back and begin another strand by hot gluing right next to or on top of that piece. Remember the back doesn’t have to look pretty – mine sure didn’t!! Hopefully this helps, it is kind of hard to put into words! Good luck and let me know how it turns out!
You weren’t kidding…I thought – how difficult can this be…lolol…I totally underestimated it. I picked a 6 letter name. Took me an hour to do the first letter. Yikes! But I’m getting the hang of it, and they look so pretty!! Thanks for the idea!
Haha I know, they certainly fooled me! Once you get going it gets easier because you figure out certain design/wrapping solutions. Recently for my nieces with longer names, (read: more than four letters) I have just been doing their first initial with a pretty fabric flower. Still is gorgeous, and their Aunt Anne Marie isn’t wrapped in yarn and covered in hot glue all of the time. Haha good luck, I am sure they are coming along beautifully!
Great post! Love the colors you used and the fabric flowers! My daughters names; Luciana and Contessa will take my multi-project-ing butt years – maybe as a graduation gift? LOL
But really, maybe I’ll make their initials.
What beautiful names! A true Italian. :) But yes – their initials would still be super cute! That would buy you time to complete them by their graduation haha
Love these by think I will just do the first initials for my two boys. One has 7 letters and the other 9!! I might finish by the time they move out of home!!
Haha better late than never. :) Plus they would look great in their dorm room!
Hello! Very interested in this!! Do you make these?? I would love my daughters name done for her Christening on November 10th. Please let me know if that’s possible. Talk soon!!
I love this I’m in the process of making them for my baby girl Selena I think I want to use a color scheme close to the one you used its so cute, instead of paying a bunch of money on letters I made my own from a big diaper box I used almost the whole box lol
I LOVE LOVE LOVE this! it is such a cute and creative idea! I want to do this for my daughter who is six months old but i hardly have time for anything these days! her name is Daileigh so I know it will be a forever-long project. she’ll proabably be a year old by the time I finish this! oh well, its be a cute birthday gift right? LOL
Thank you! Maybe try one letter a month? Haha then you’d still have a four month buffer!
This such a great idea. I about to sit down and start myself, actually. My daughter turns 1 on Saturday and I’m making these as decor for the party that will turn into decor for her room. I’m so happy I found your blog! My daughter’s name is Mikayla so this should be fun…hopefully…
I am also so happy you found my blog and for your nice comment! :) These letters would be perfect decor for a party! Did you end up making them?
Thanks for the inspiration-LOVE this! Gearing up to start the 1st project in our new home and hoping that opting with my son’s 3-letter nickname “Kea” will be the smarter choice. :) Aloha!
Aloha, Courtney! :) So happy you love these letters and are making them for your new house – “Kea” will be so cute! Good luck- let me know how it goes!
HI!
I noticed you used lower case letters. My daughters name is Sydney. I like the understated lower case letters but im concerned they wont be able to stand on a shelf?????? any suggestions?
Hi Lauren!
I am extremely sorry for the wayyyy late response. Blogging has been on the back burner for awhile as this summer has been insane!
No matter what, I find that these letters need to lean up against the wall if not being hung up, as the yarn on the bottom of the letters makes them pretty wobbly. And even if they did stand up, they are hollow and pretty light – so the first gust of wind may have them toppling over!
Hope this helps – if you already made them, let me know how they turned out. :)
Sweet! Thanks for the inspiration, I’m looking for ideas and I love the colors; I never thought to use yarn, I will be using lace too.
Awesome, let me know how they turn out!
I love these! Thank you for the idea. I am going to make them for a baby shower coming up! Her name is short too thank goodness – Mia!